Saturday, 23 April 2016

Still Catching My Breath From Scrapfest in Kitchener


I know these pictures are far overdue but I have literally not had a moment to sit at my computer and put a proper post together in weeks. I love these pictures of my partner in crime Juanette Fillery and I.

As I wrote in a post last year, I have been unable to attend Scrapfest for several years. It had become for me another huge hurdle that I just could not overcome. I was afraid returning to Scrapfest would hurt too much, make me remember how much I miss my friend Rebecca who used to attend with me every year.

I know that Rebecca was watching over us on April 9th as our bus load of fabulous ladies hit the road to Kitchener. I was so blessed that Rebecca's mother-in-law decided to come with me. I think it was good for both of us to make the return together.

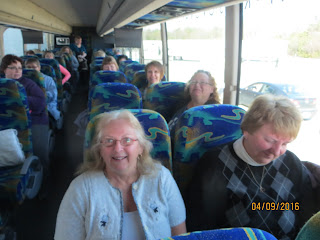
A big shout out to Nicole at McCoy transportation who opted to upgrade our bus rather then take any risk with a bus with a minor issue. We loved the extra space (more room for our shopping treasures). Our bus driver was a hoot.


Lisa Sales-Furtney was a wonderful hostess, as always, and made each of us feel like VIPs. Her sense of humour kept us all in stitches. She even came as we were leaving and checked out the bus. We wanted to keep her but were promised that we will see her again soon.


There were so many beautiful displays this year. Everyone went all out to make the event a huge success.

Some of my favourite stops were Kraftin Kimmie Stamps, Southern Ridge Trading Co., Local Kings Rubber Stamps, Frog's Whiskers, Scrapping Turtle....there were so many this is just the short list.


I will be posting the goodies that I purchased while I was there throughout the week.

We are already planning our road trip to Kitchener for next year. Give me a call if you want to get in on the adventure.


One of the highlights of my day was grabbing a photo with Creative Scrapbooker Magazine's Publisher Katharina Doyle.

Friday, 8 April 2016

April Free Stamp From Gecko Galz.

I apologise. This week has been hectic with the final details of our bus trip to Scrapfest in Kitchener this weekend. I am so excited to have some of my absolute favourite papercrafters coming for the trip. A big shout out to Nicole at McCoy Bus line who did a fabulous job at getting our little adventure off the ground. Also, a huge thank you to my friend and Co-Hosts Cathy Dafoe and Angie McColeman for finding the fabulous ladies that are travelling with us. A special thank you to Lisa Sales Furtney the owner of Scrapfest for all her help in making this trip possible.

That being said, here is you beautiful free stamp. Enjoy!


Wednesday, 30 March 2016

Recycled Egg Carton Roses

A few weeks ago I told you that I was working on several projects that I would be finishing and posting as they were complete. This project was part of that job lot. Rather, the flowers were.  I have seen these lovely roses on Pinterest and wanted to give them a try. They were very easy to make. Unfortunately it took me this long to find a project big enough to use them on. 


This week I needed to have an entry for a homemade flower challenge being hosted at Girls, Giggles, Glitter and Glue  . I had intended to submit my cold porcelain roses that I used on my Spring Fairy House but at the last minute I found the perfect project to hold the egg carton roses.

I apologise that this post is up after Easter but it might give you an idea for an end of year/ happy summer vacation gift for your child's teachers or a beautiful Mother's Day gift.


All you need to make these roses is a cardboard egg carton and some spray ink or paint. 

How To:


  1. Cut the cups out of the bottom of the egg carton. I rounded off any extra pieces to make them uniform.
  2. Cut the cup into 5 petals. Try to get the cut all the way to the bottom of the cup as this will give you more room to roll the sides.
  3. Spray the cartons will colour of your choice. Allow to dry until they are just barely moist to the touch.
  4. Use a hot glue gun and overlap the edge of one petal onto the the next. Do this with the next cup but push the petals closer together. 
  5. On a third cup roll the petals up starting at one side and rolling as tightly as possible. This makes the bulb of the flower. 
  6. Glue the bud to the centre of the medium sized layer by adding a dollop of hot glue to the bottom only. 
  7. Do the same with the final layer. 
  8. Use your fingers, a pencil or tweezers to roll back the edges of your petals. 
  9. Spray with additional colour and allow to dry completely.


Thursday, 24 March 2016

We interrupt this the regularly scheduled blog post for yet another Snow Day

There was a PA day and a snow day just before the March break and then the kids went back for 3 whole days and now there is a snow day attached to the Easter break. I love having the kids home and the extra family time, but wow its hard to get my projects finished on time.

I am just going to post a little card I made for the March Gecko Galz Challenge where Hands are the focal point. They are not really the focal point, but she does have hands so I think that is close enough.

Enjoy!

Have a wonderful Easter with your family and I will be back to posting on Tuesday of next week.

God Bless!

Tracy